
How to Make Boba at Home: Tea, Tapioca Pearls, Sweetness & Assembly
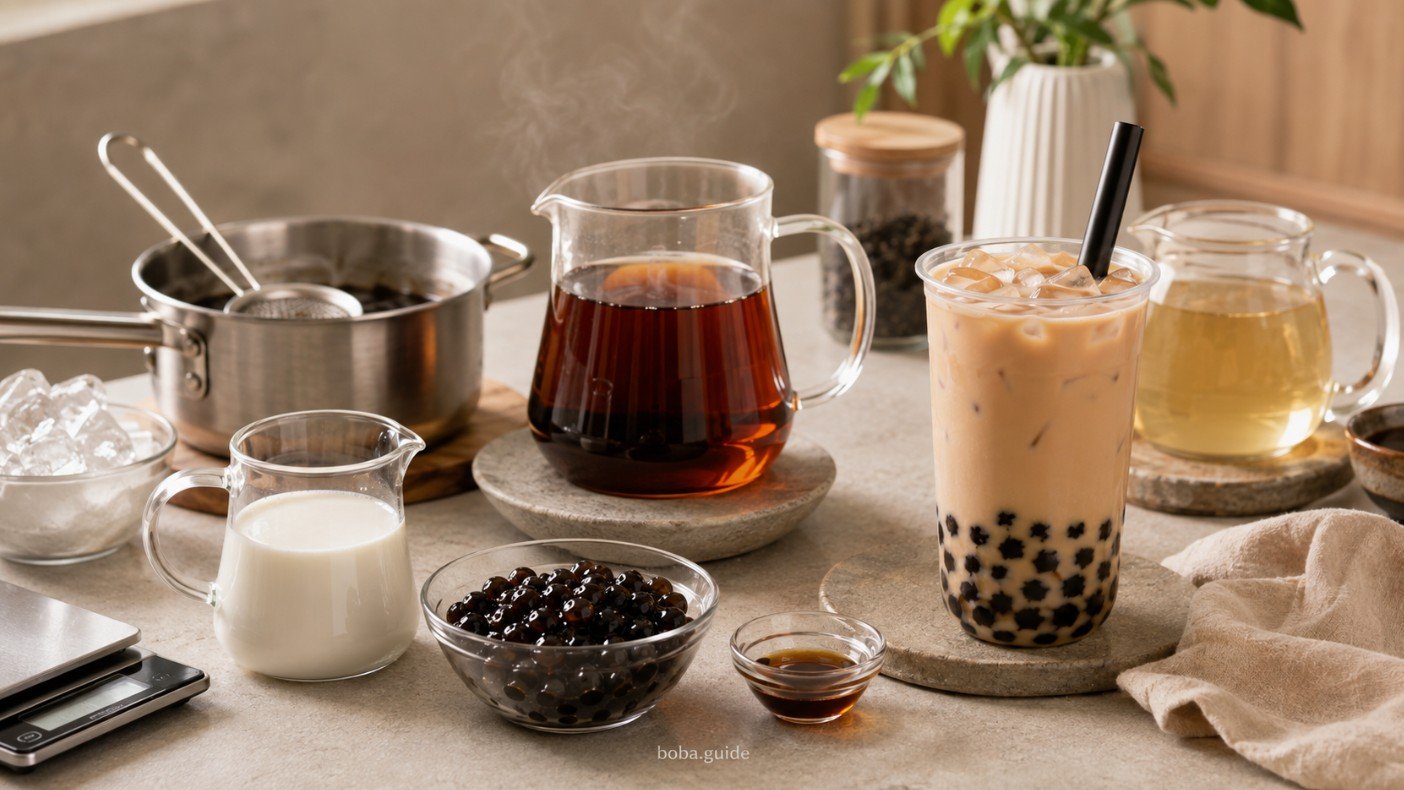
Making boba at home is easiest when you treat it as five separate jobs: cook the topping, brew a tea base strong enough to survive dilution, choose the milk or fruit component, control sweetness, then assemble the drink with ice. The biggest beginner mistake is trying to do all five at once without accounting for temperature and timing.
A reliable homemade cup does not require a professional shaker or a wall of syrups. You do need enough water for the pearls, a strong tea base, a wide straw, and a plan for serving the cooked tapioca while its texture is still good. This guide gives you one practical starting formula, then shows how to change it without losing the balance of the drink.
A practical 16 fl oz homemade boba starting formula
This is a Boba.guide starting formula, not an industry standard. Different tea, milk, pearl brands and ice amounts change the ideal balance. Use it to learn the proportions, then adjust one variable at a time.
For one 16 fl oz cold milk tea with tapioca
Strongly brewed black tea
Fresh milk or preferred milk
Sweetened after cooking
Simple, brown-sugar or honey syrup
Enough to chill without drowning the tea
The 60–80 g pearl reference aligns with a current Bossen food-service serving recommendation for a 16 fl oz drink. The tea/milk/syrup proportions above are our practical home starting point, not a universal shop formula.
If you are new to the whole category, the homepage explains the larger boba system — drinks, toppings, tea bases, ordering and local discovery — while this page stays focused on making one at home.
The easiest homemade boba workflow starts with the slowest component
Do not begin by pouring milk into a glass. Start with the ingredient that controls the clock: tapioca. Traditional dry pearls can take roughly an hour from boiling water to finished resting, while some quick-cook products are much faster.
Start the tapioca
Bring plenty of water to a full boil before adding dry pearls. Follow the exact bag directions because cook/rest times vary widely by product.
Brew the tea while pearls cook
Make the tea stronger than a delicate sipping tea. The base still has to be recognizable after milk, sweetener and ice.
Cool the tea efficiently
Do not leave a large hot tea concentrate sitting until the pearls are ready. Strain it and cool it so you can assemble without melting excessive ice.
Drain, rinse and sweeten the pearls
The pearls need flavor after cooking. Sweetening also changes how they sit together and how the first sip tastes.
Build the drink
Pearls first, then sweetener if needed, tea, milk or fruit component, and finally ice or shaking.
The tea can wait and cool. Fresh cooked tapioca has a much shorter ideal texture window. Plan the drink around the pearls, not the other way around.
Cook tapioca pearls in fully boiling water, with more water than beginners expect
Taiwan agricultural guidance for 粉圓 emphasizes two principles that translate well to home boba: add the pearls only after the water is boiling, and use enough cooking water that the temperature does not collapse when the starch hits the pot.
Hot water quickly gelatinizes the outside starch and helps the pearl keep its shape.
Taiwan guidance gives a broad pearl-to-water range of about 1:6 to 1:10. Commercial instructions vary inside that range.
Newly added pearls can sink and stick to one another or to the pot before they float.
Some products continue cooking internally during a covered rest after the heat is turned off.
Why the bag directions matter
Bossen’s classic recipe uses roughly a 1:6 pearl-to-water ratio, about 30 minutes cooking + 35 minutes covered rest. Possmei publishes a different standard process using 1:10, about 35 + 35 minutes.
Those are both real manufacturer processes. Neither should be treated as a universal recipe for every pearl on the market.
General method for packaged dry tapioca pearls
Bring a large pot of water to a strong boil.
Add the pearls gradually and stir immediately so they separate.
Cook according to the manufacturer time, stirring occasionally.
If the product calls for a covered rest, turn off the heat and complete it.
Drain the pearls and rinse briefly to remove loose surface starch and stop carryover cooking.
Sweeten while the pearls are still warm, then let them absorb the syrup before serving.
For product-specific timing and texture troubleshooting, use the dedicated how to cook boba pearls guide. If you want to form the pearls from starch yourself rather than cook a packaged product, that is a different job covered in how to make boba pearls from scratch.
Brew a tea base that remains recognizable after milk, syrup and ice
Taiwan’s Tea and Beverage Research Station has tested multiple tea categories at 80°C, 90°C and boiling water. For black tea, its sensory results favored roughly 90°C to boiling over 80°C. That gives home boba makers a useful temperature range, but concentration still depends on leaf amount, particle size and steep time.
Strong, malty, tannic enough for milk
Use water around 90–100°C. Taiwan’s Tea Research and Extension Station gives a general big-teapot reference of about a 1:50 tea-to-water ratio with a 5–6 minute steep for ordinary drinking tea. That is not a boba-concentrate formula: for boba, build more concentration deliberately rather than simply leaving the same leaves in much longer and extracting more bitterness.
Fragrant or roasted
Temperature depends on the oolong. Heavier roasted styles can tolerate hotter water; delicate aromatic styles may need more restraint. The goal is aroma plus enough body for the final drink.
Lighter and more floral
Use a gentler brew than black tea and protect the jasmine aroma. Fruit-style boba often works better with this kind of base than a heavy dairy build.
A useful home approach: increase leaf before you increase steep time
If a normal cup tastes too weak after ice and milk, try more tea leaf at a reasonable steep time before simply leaving the same leaves in much longer. Excessive time can increase bitterness and astringency faster than it improves useful tea body.
For deeper brewing control, continue to how to brew tea for boba, how strong tea should be for boba, or the broader tea-for-boba guide.
Milk tea, fruit tea and fresh-milk boba are not the same recipe with different flavoring
One of the most useful things to learn at home is that the same topping can sit inside completely different drink architectures. “Boba” does not require milk, and “milk tea” does not require a powder.
Tea + milk + sweetener
Start with a strong black, oolong or jasmine tea. Add enough milk to soften the tea without erasing it. Fresh milk, evaporated milk, creamer and non-dairy alternatives all change body differently.
Tea + fruit + sweetener
Use a brighter tea base and fruit puree, juice, concentrate or syrup. Acidity matters: some fruit combinations can curdle dairy, so fruit tea is often cleaner without milk.
Milk + pearls/syrup, sometimes no tea
Brown-sugar fresh milk is a good example of a drink that can look like milk tea while containing little or no brewed tea. The syrup and pearls carry more of the flavor load.
If you want the full milk-tea method, use how to make milk tea. For a tea-and-fruit build, continue to how to make fruit tea for boba.
Sweeten the drink and the pearls separately, then taste the combination
A homemade drink can become too sweet even when the tea itself has very little syrup, because the pearls may already be sitting in brown sugar or honey. Treat the topping syrup as part of the total sweetness budget.
Best when pearls are already sweet or the milk is naturally sweet.
A practical middle starting point for a 16 fl oz home cup.
Use intentionally, especially with brown-sugar pearls or flavored powders.
The numbers above are home starting points, not equivalents of a chain’s “30%,” “50%” or “100%” buttons. Shop percentages are internal recipes and are not standardized across brands.
For the topping itself, see how to sweeten boba pearls. For menu-style percentage logic, see boba sweetness levels.
Ice does more than make boba cold
Hot tea poured directly over a full cup of ice can melt enough water into the drink to flatten a tea base that tasted perfect before assembly. The easiest fix is not “no ice”; it is designing the tea concentration and cooling method together.
Use a smaller amount of ice to flash-chill the concentrate, then add fresh ice for serving. Expect the first ice to become part of the water balance.
You can use less ice for dilution control because the ice does not have to absorb as much heat.
Pre-chill the tea and milk. “No ice” does not automatically mean a shop — or your kitchen — should replace the missing ice with extra liquid.
The deeper dilution question belongs in boba ice levels.
Assemble homemade boba so every sip contains tea, not just syrup and ice
Once the tea is cold enough and the pearls are sweetened, assembly should be fast. The exact order is flexible, but putting pearls in first makes portioning and presentation easier.
Add 60–80 g cooked tapioca to the bottom of the cup.
Add any extra drink sweetener, remembering that pearl syrup also counts.
Pour in the strong cooled tea base.
Add the component that defines the drink style.
Finish with enough ice for the temperature and dilution you want.
Stir thoroughly or shake in a sealed shaker before inserting a wide straw.
One balanced first attempt
60 g sweetened pearls + 200 ml strong black tea + 75 ml milk + 15 ml syrup + ice.
Taste it. If the tea disappears, strengthen the tea next time rather than removing all the milk. If the sweetness overwhelms the tea, reduce drink syrup before reducing the syrup holding the pearls.
A 60-minute homemade boba timing plan for traditional pearls
If your dry pearls use a traditional cook-and-rest method, the drink feels much easier when tea preparation happens inside the pearl clock. This example assumes a product with roughly 25–30 minutes of cooking plus a covered rest; always replace these times with the instructions on your actual package.
Start a large pot of water
Use enough water for the product ratio. Traditional Taiwan-style pearl guidance commonly falls around 1:6 to 1:10 pearls-to-water by weight/volume reference, depending on the manufacturer.
Add pearls only after the water is boiling
Stir immediately. Once the product reaches its prescribed cooking state, reduce or manage heat according to the package rather than improvising from a different brand’s recipe.
Brew the tea
While the pearls cook, measure tea and water. Strain the tea when it reaches the strength you want; do not leave it steeping for the entire pearl cook just because you are busy.
Cool the tea
Transfer the strained tea to a heat-safe container. A shallow vessel, an ice bath around the container or refrigeration can cool it without adding uncontrolled water directly to the tea.
Begin the covered pearl rest
If your product requires resting off heat, cover it and use this quieter period to measure milk, prepare syrup, fill the serving cup and clean the tea equipment.
Drain, rinse and sweeten
Once the pearl center is fully cooked, drain and rinse according to the product method, then add syrup while the pearls are warm enough to take on flavor.
Assemble and drink
Give the pearls their recommended syrup rest if needed, then build the cup. From this point forward, the pearl freshness clock matters more than the tea clock.
The important idea is not that every batch takes exactly one hour. It is that tea, milk and syrup preparation can fit around the pearl process instead of extending the total project unnecessarily. A five-minute quick-cook product changes the schedule completely.
How to scale the starting formula for 1, 2 or 4 drinks
The drink ingredients scale almost linearly. Tapioca cooking is different: keep the manufacturer’s water ratio and pot-space requirement rather than simply using four times as many pearls in a pot that was barely large enough for one batch.
You can usually brew the tea as one batch and divide it. This reduces measurement error and keeps both drinks at the same strength.
Do not assume one small saucepan can handle the pearl batch. Crowding lowers water circulation and makes sticking and uneven cooking more likely.
When serving several people, assemble the drinks together after the pearls are ready. Do not complete the first cup 30 minutes before the fourth if you want comparable temperature, dilution and topping texture.
Choose ingredients by function, not by what looks most “authentic” online
Home boba becomes much easier when every ingredient has a job. Tea provides aroma and structure, milk changes body, syrup controls sweetness, tapioca provides chew, and ice sets temperature while adding some dilution.
Black tea for a forgiving first milk tea
Assam-style or other robust black teas are easy starting points because their malt, tannin and color remain noticeable after milk. Oolong can be more aromatic or roasted; jasmine green tea is useful for lighter fruit drinks.
Fresh milk gives a cleaner dairy profile
Whole milk adds more body than low-fat milk. Oat, soy and other alternatives behave differently, so the same 75 ml may not produce the same creaminess. Sweetened plant milks also change the sugar calculation.
Simple syrup dissolves more predictably than granulated sugar in a cold drink
Brown-sugar syrup adds molasses-like depth; honey adds aroma; plain simple syrup changes sweetness with less flavor. The syrup holding the pearls is part of the same sweetness system.
Traditional dry pearls reward planning; quick-cook pearls reward convenience
A long-cook pearl can make sense for a weekend batch. A fast product may be more practical when you want one cup after work. Texture quality depends on the exact product and preparation, not just the word “traditional.”
Large solid cubes dilute more slowly than crushed ice
Ice shape and starting drink temperature affect melt rate. You do not need laboratory precision, but you should notice whether your ice is mainly chilling the cup or becoming a major part of its water volume.
Tea bags are completely workable at home
The question is concentration, not prestige. If one tea bag makes a pleasant 8–12 oz sipping cup, one bag may be too weak for a milk tea that also receives syrup and ice. Use more tea bags or less brewing water, then remove them on time instead of compensating with an extremely long steep.
Three easy boba variations from the same kitchen setup
Once the pearls and workflow make sense, change the base rather than rebuilding the whole process.
The most forgiving place to start because black tea has enough body to remain noticeable after dairy and ice.
Keep the tea brighter and lighter. Fresh citrus should be added after the tea cools rather than cooked into the tea base.
Tea is optional in this architecture. The goal is contrast between dark caramelized syrup, milk and chewy pearls.
Once the baseline cup works, change only one major variable at a time — tea base, milk system, fruit component or topping — so you can tell what actually improved the drink.
Why homemade boba goes wrong — and what to change next time
The fastest way to improve is to identify which component failed. A watery drink is not always an ice problem; hard pearls are not always undercooked; a too-sweet cup may be coming from the topping rather than the tea.
Tea was brewed like sipping tea, then diluted by milk and ice.
Next attemptIncrease leaf concentration or reduce hot-water volume before increasing steep time aggressively.
Insufficient cooking/rest or water temperature fell too far after adding the pearls.
Next attemptUse more boiling water and follow the full product rest stage.
Overcooking, excessive holding or a product-specific timing mismatch.
Next attemptShorten the process only after checking the manufacturer’s instructions.
Pearl syrup + drink syrup + sweetened milk/powder stacked together.
Next attemptCount all sweetness sources before reducing the pearl soak.
Too much milk for the strength of the tea concentrate.
Next attemptMake stronger tea first; then tune the milk ratio.
Tea was assembled too hot.
Next attemptPre-cool the tea or use a controlled first chill before final ice.
For the ratio between tea and dairy specifically, use tea-to-milk ratio for boba.
Homemade boba can be inexpensive per cup, but only if you avoid wasting pearls
Dry tapioca is cheap relative to a finished café drink. The bigger home-kitchen problem is package size and freshness after cooking.
Observed from current Bossen and Fanale food-service listings checked August 19, 2026.
At a $10.18 bag price, that is roughly $0.20–$0.29 in dry pearls per stated serving before syrup, shipping, energy and waste.
A home user usually should not buy the biggest food-service case simply because the unit price is lower. Cooked pearls are best served within a short window, and opened dry-product guidance can also be restrictive depending on the brand. Buying a smaller pack you can actually use may cost more per pound but waste less money overall.
Tea, milk and sweetener vary too much by brand and grocery market for one honest universal “homemade boba costs exactly $X” figure. If you already keep tea, milk and sugar at home, tapioca itself is often one of the smaller ingredient costs.
You need less equipment than most boba starter kits imply
A functional home setup is simple. Specialized equipment becomes useful when you make boba often, not before your first cup.
- Large pot for pearls
- Fine strainer or slotted scoop
- Kettle or saucepan for tea
- Measuring cup
- Kitchen scale if possible
- Large cup or glass
- Wide boba straw
- Tea filter basket
- Cocktail-style shaker
- Squeeze bottle for syrup
- Digital thermometer
- Reusable boba cup
If you are building a more complete home setup, compare the broader boba supplies category. If your question is about what actually goes into the drink, use boba ingredients.
Use food-grade tapioca starch or commercial pearls — and treat cooked pearls as a same-day food
Making pearls from purified tapioca starch is different from casually processing raw cassava root. Raw cassava can contain cyanogenic compounds and requires appropriate processing. For home boba, use food-grade tapioca starch or a commercial pearl product rather than improvising with raw cassava.
Manufacturer guidance commonly treats cooked tapioca as a short-hold product. Possmei recommends consuming its cooked pearls within about 3–4 hours; Bossen recommends its prepared pearls within about 4 hours for best texture.
Refrigeration can make cooked tapioca hard as the starch structure changes. If food-safety conditions require disposal, texture-restoration tricks are not a substitute for safe handling.
Round chewy pearls can be a choking hazard. Follow the exact product warning and supervise appropriately; some commercial products explicitly warn against serving to young children.
Where to go after your first homemade cup
The fastest way to improve is to change one component deliberately instead of changing five variables at once.
Found a home method that actually improved the cup?
Send your tea, pearl brand, cook time, milk choice and the change that made the biggest difference to info@boba.guide. We are especially interested in repeatable fixes — not just pretty photos — that help other home boba makers get better tea flavor and fresher pearl texture.
Making boba at home: common questions
What do I need to make boba at home?
For a basic milk tea with tapioca, you need tea, packaged tapioca pearls, milk or a milk alternative, sweetener, water, ice and a wide straw. A large pot, strainer and measuring cup are enough for the first batch.
How much cooked tapioca should I put in one drink?
There is no universal amount. A useful food-service reference is about 60–80 g (2.1–2.8 oz) of cooked large tapioca pearls for a 16 fl oz drink. Start at the lower end if you want more tea and less chewing.
How strong should tea be for homemade boba?
The tea should be stronger than a delicate sipping tea because milk, sweetener and melting ice dilute it. For black tea, Taiwan tea research supports brewing around 90°C to boiling; concentration should be adjusted mainly with leaf amount and water volume rather than extremely long steeping.
Can I make boba without milk?
Yes. Fruit tea, straight tea with pearls, sparkling drinks and other boba styles can be completely milk-free. Boba describes a wider drink and topping category than milk tea alone.
Why are my tapioca pearls hard in the middle?
A hard center usually means the pearl did not receive enough heat or resting time for that product. Use enough boiling water, avoid dropping the pot temperature too sharply and follow the manufacturer’s full cooking and resting directions.
Why does my homemade boba taste watery?
The tea base is often too weak before milk and ice are added. Brew a more concentrated tea, cool it before final assembly and remember that melting ice becomes part of the drink’s water balance.
How long can I keep cooked boba pearls?
For the best texture, commercial manufacturers commonly recommend serving cooked tapioca within a few hours. Possmei recommends about 3–4 hours for its pearls, while Bossen recommends prepared pearls within about four hours. Follow the exact product instructions you use.
Can I refrigerate cooked tapioca pearls?
Refrigeration often makes cooked tapioca firmer and less elastic as the starch structure changes. For classic pearl texture, make a smaller batch you can use in the product’s recommended serving window rather than relying on refrigeration to preserve fresh chew.
Can I make boba with tea bags?
Yes. Tea bags can work, but you may need more tea than you would use for a normal sipping cup so the flavor remains recognizable after milk, syrup and ice. Avoid simply steeping one bag for an excessively long time because that can increase bitterness.
Is homemade boba cheaper than buying it at a shop?
It can be, especially if you already have tea, milk and sugar at home. Dry tapioca is relatively inexpensive, but the real home economics depend on package size, shipping and whether you can use the pearls before cooked batches lose their best texture.